
How-To Guide: Canvas Photo Transfer
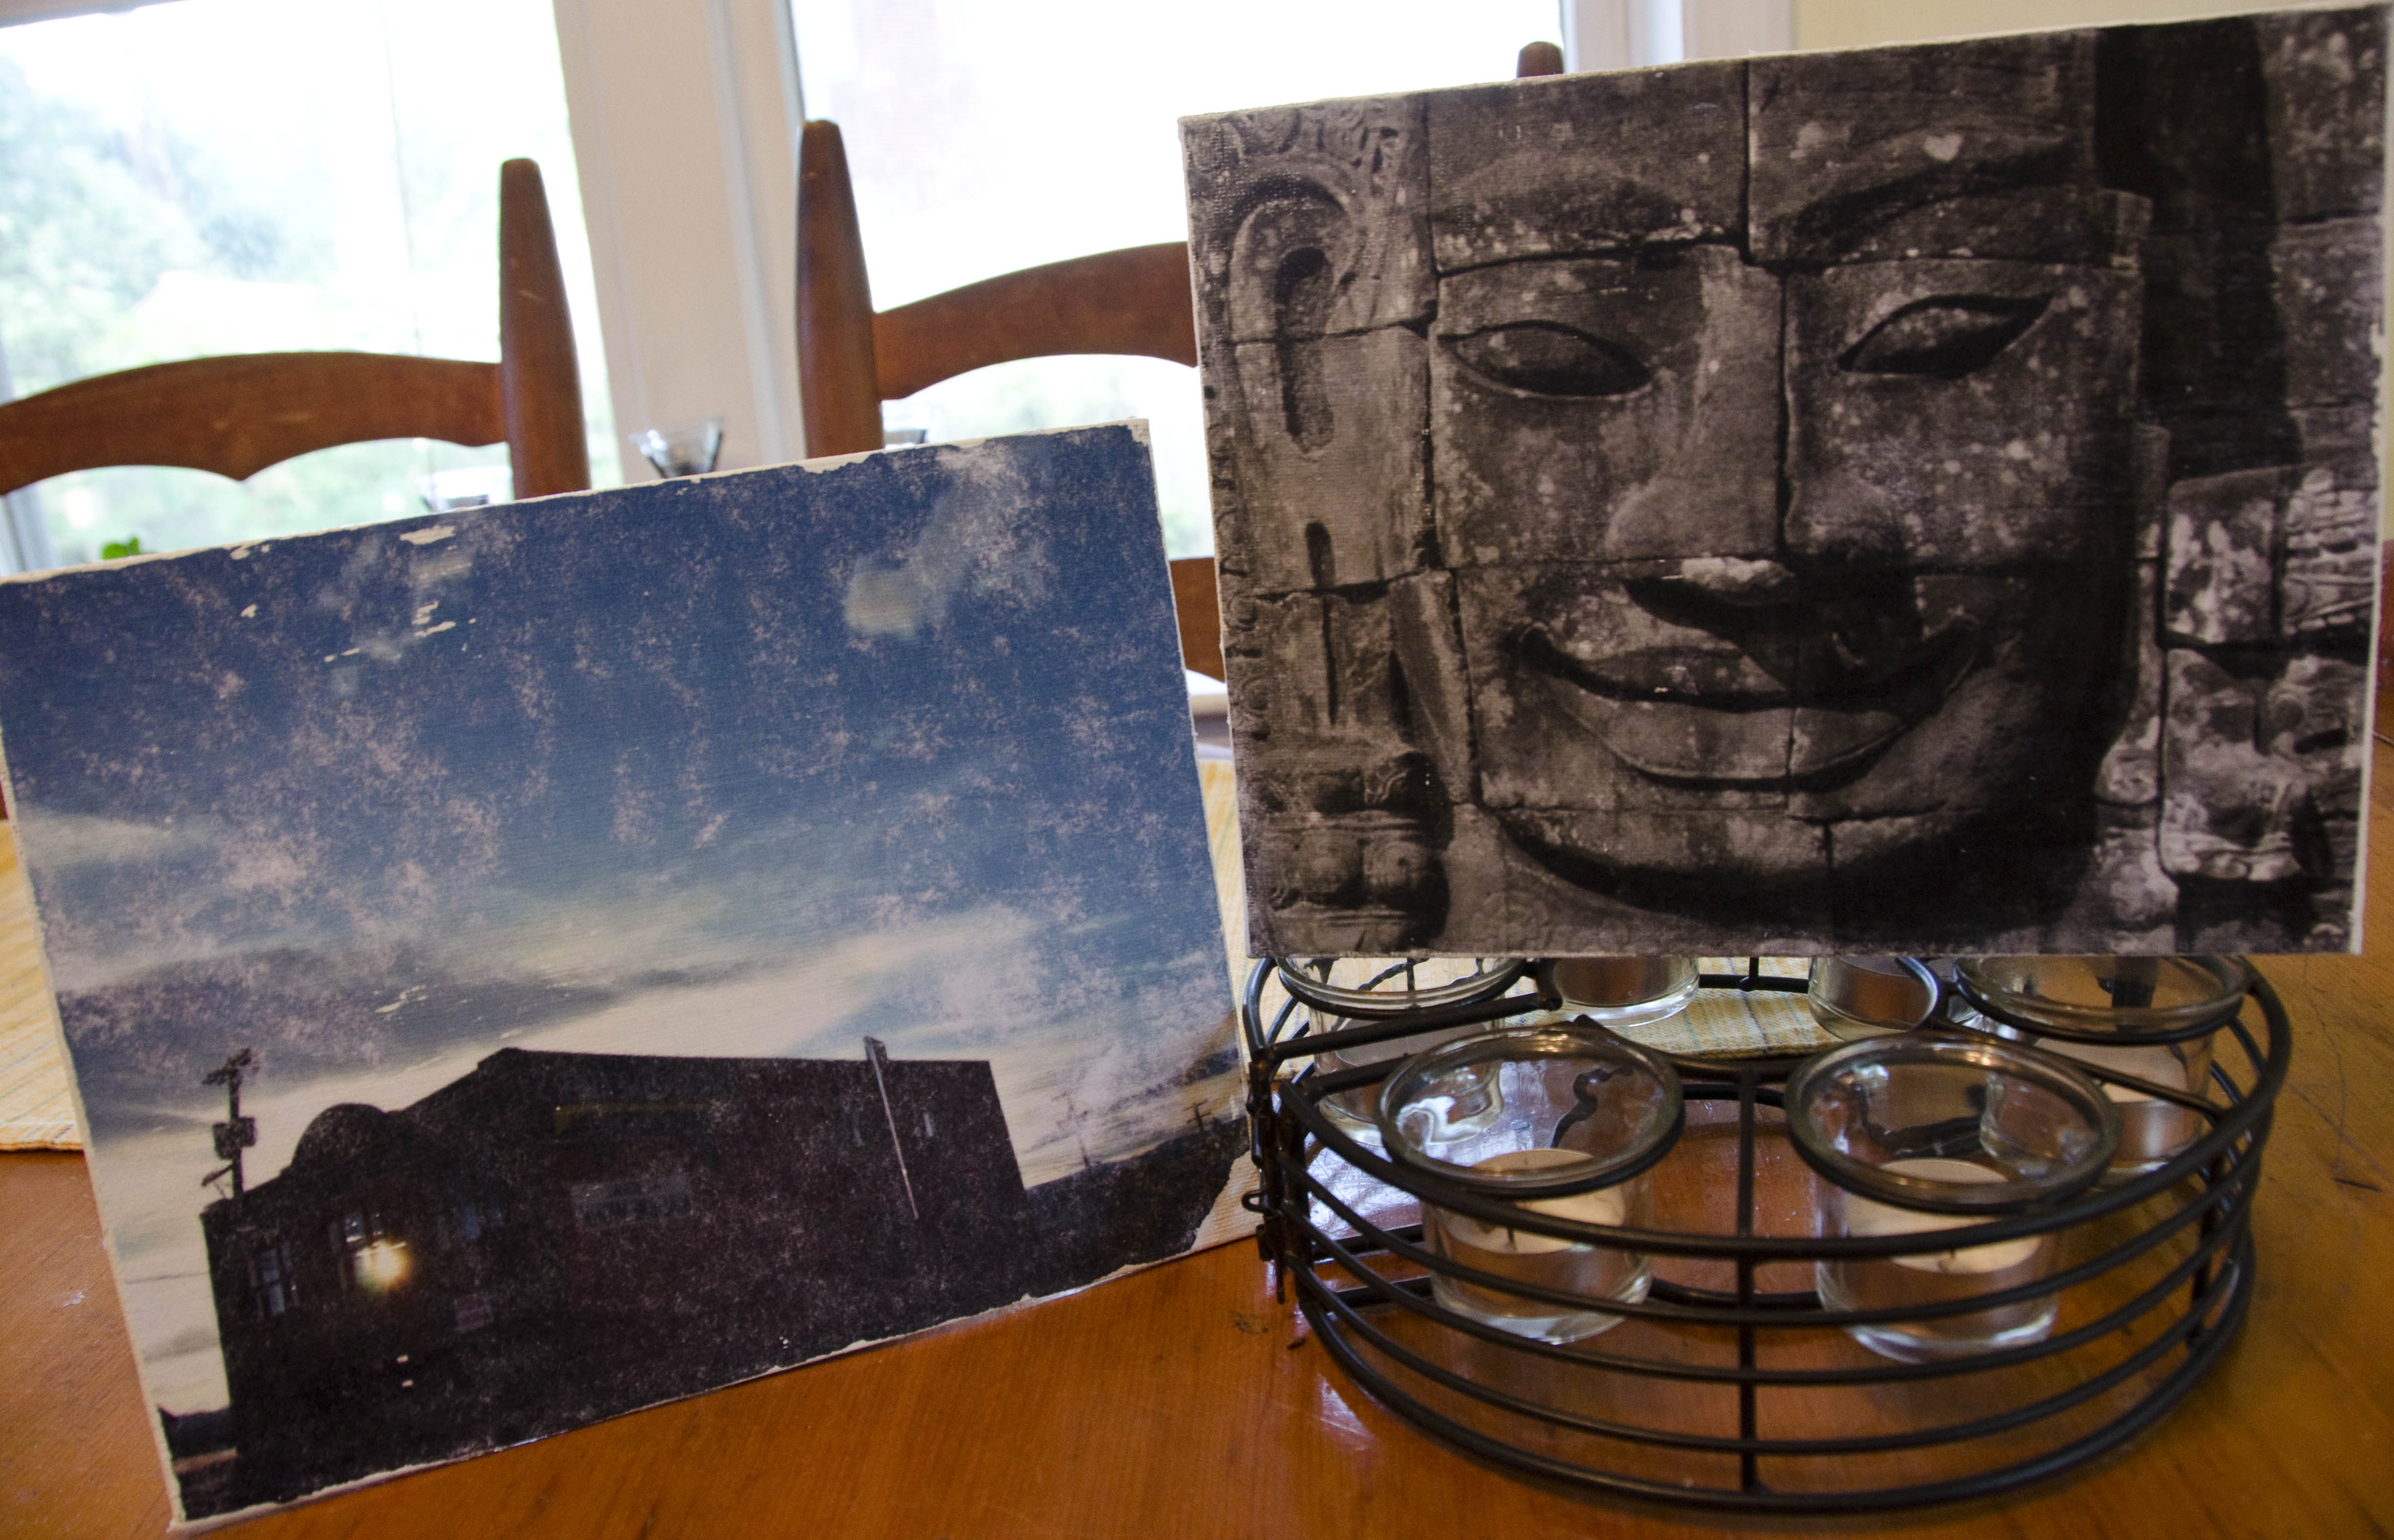
If you’re anything like me, you have a hard drive (or three) of photos waiting to be printed. Take matters into your own hands and do it right at home! Printing onto canvas turns your photos into unique pieces that you can’t get from a print shop. Each transfer is wonderfully and uniquely imperfect, which gives them a vintage look and feel.
For my first experiment, I used a color print of sunset at the “Sheep Shearer’s Union Hall” in Butte, Montana and a black-and-white print of a statue from Ta Prahm temple in Cambodia. I think it worked equally well for both, although next time I would definitely choose a color print with less detail.
Materials: A laser-printed copy of your photo, an 8×10 inch canvas board, a paintbrush, a jar of heavy gel gloss, and a spray bottle of water. Did I mention that this is really easy?
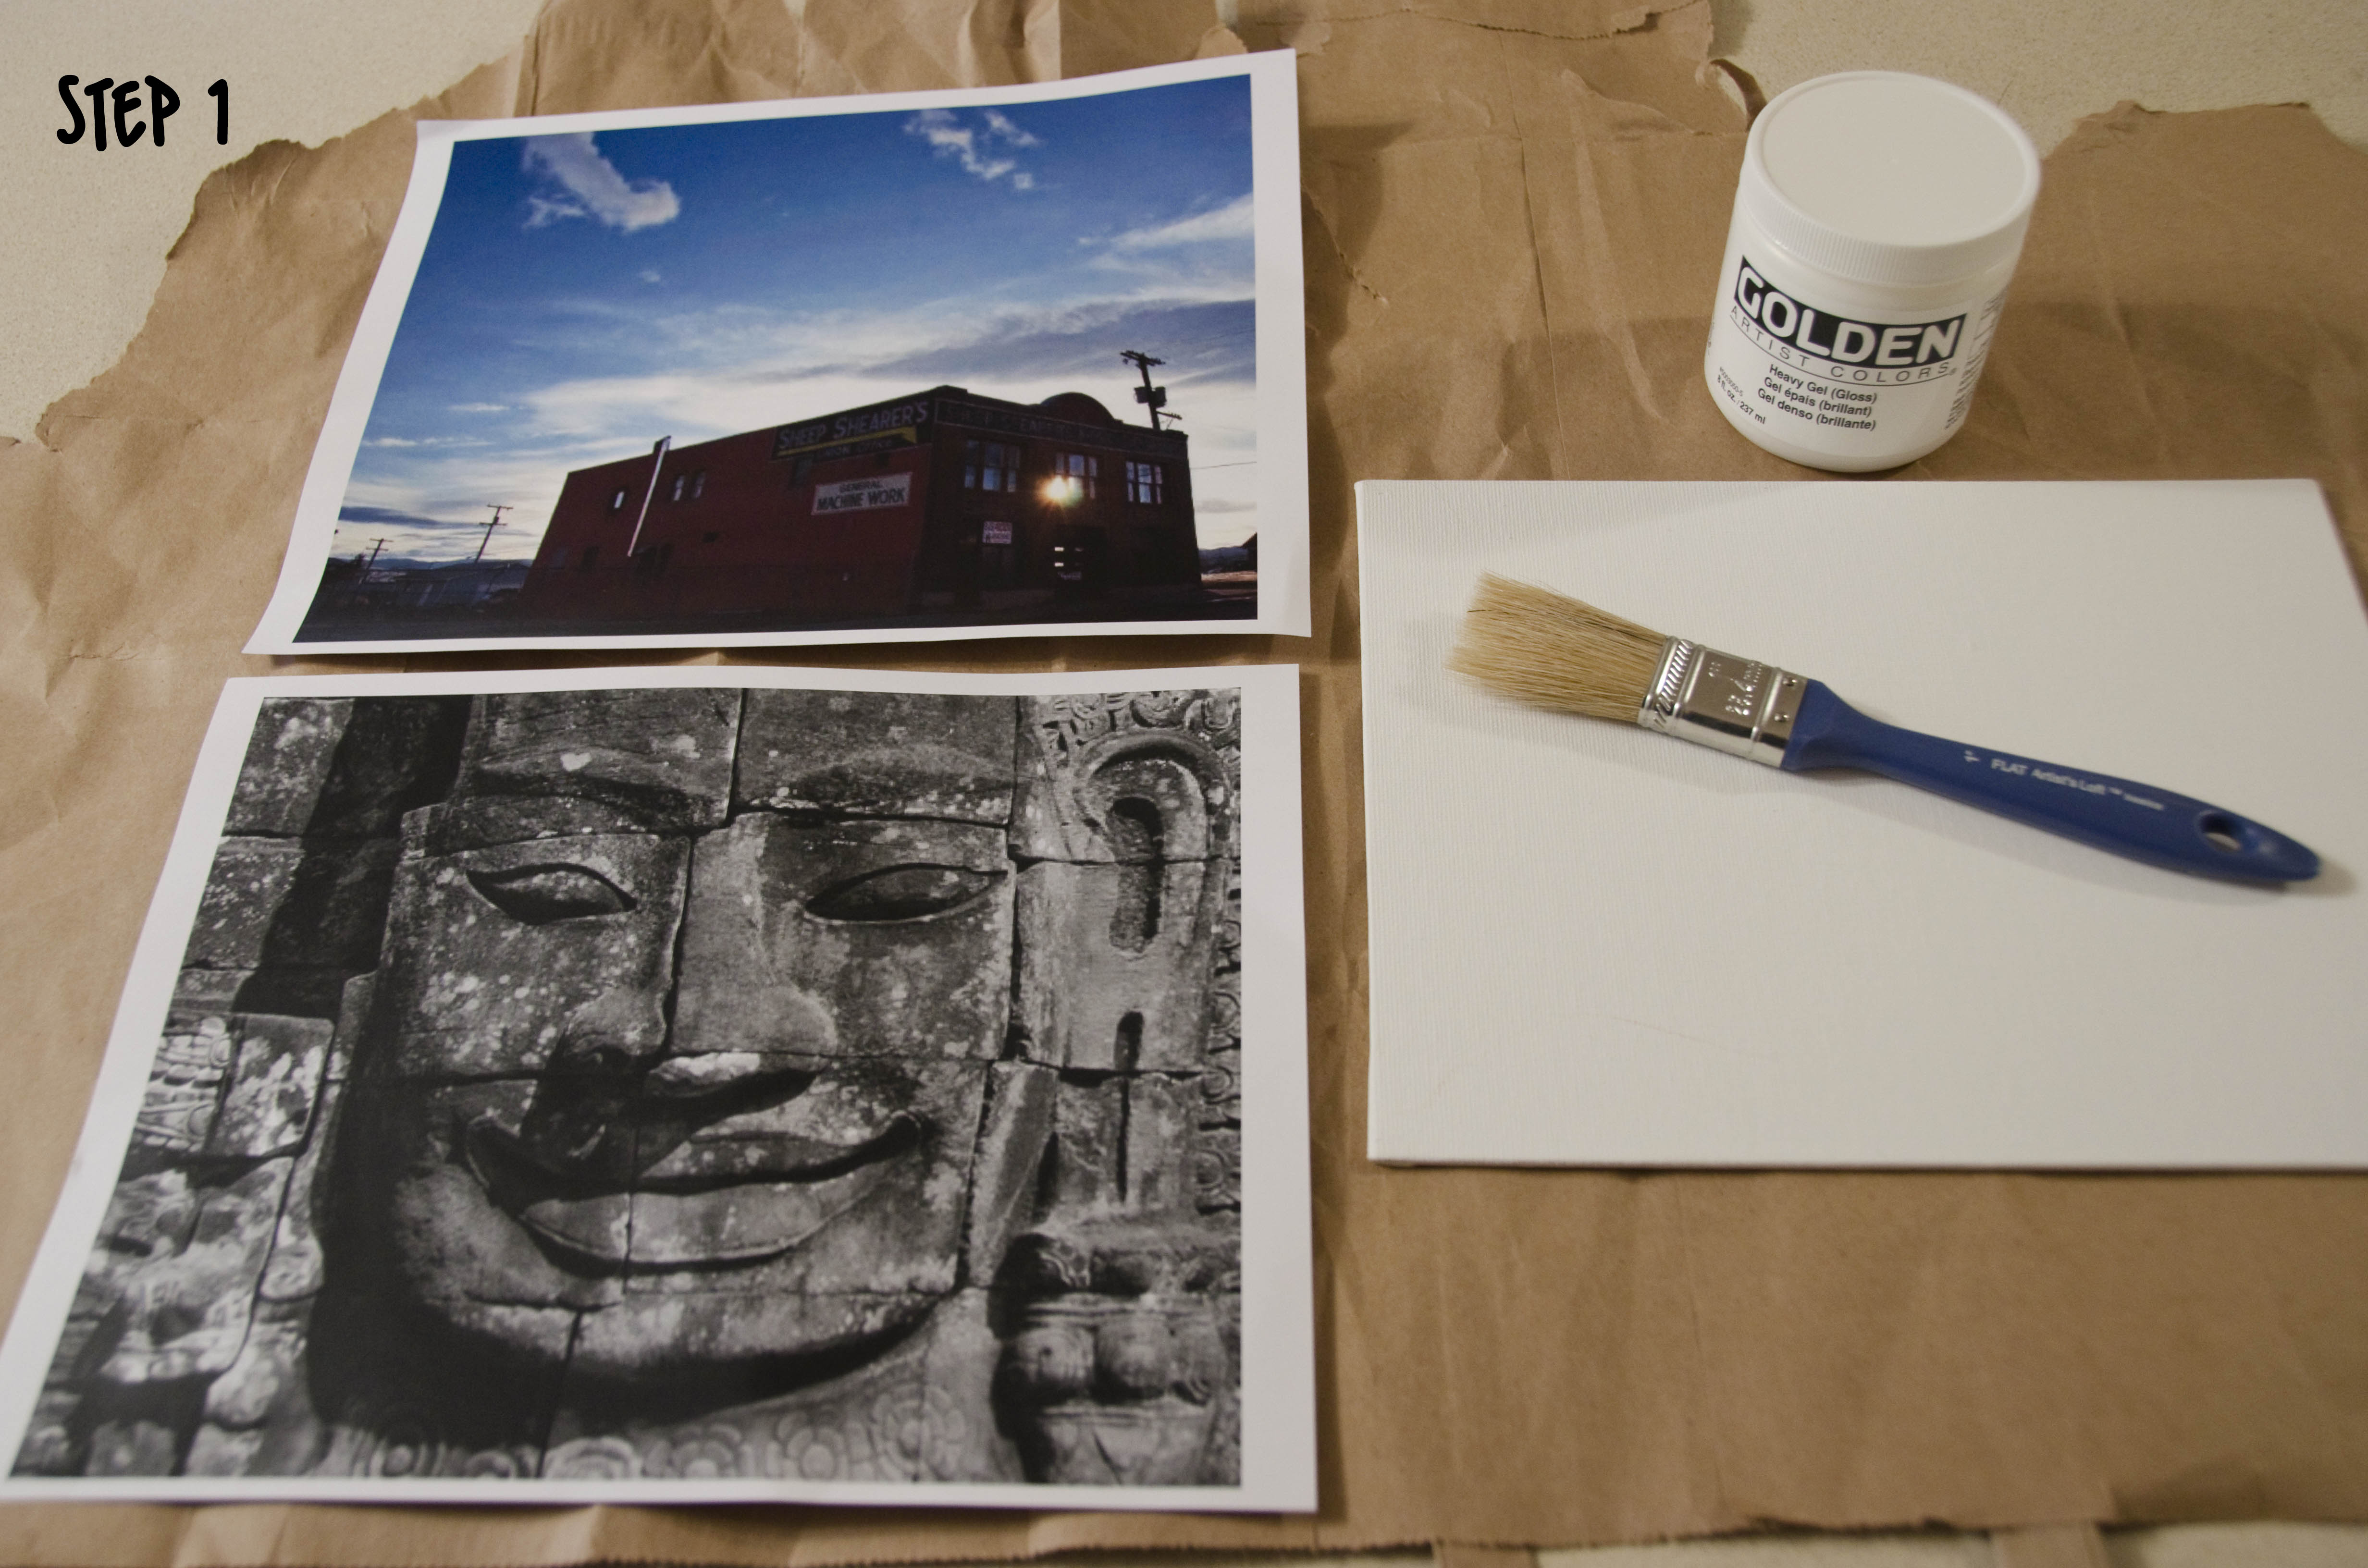
Step 1: Print a copy of your photo using a laser printer. This is very important because the kind of ink from an ink-jet printer won’t work. I took mine to a copy shop and had them print out a copy (I just emailed it to myself and printed it from their computer). Remember that your image will print reversed, so if there are any words on it, make sure to print a “mirror copy.” You may notice, if you look carefully at my picture of the “Sheep Shearer’s Union” building, that I forgot to do this.
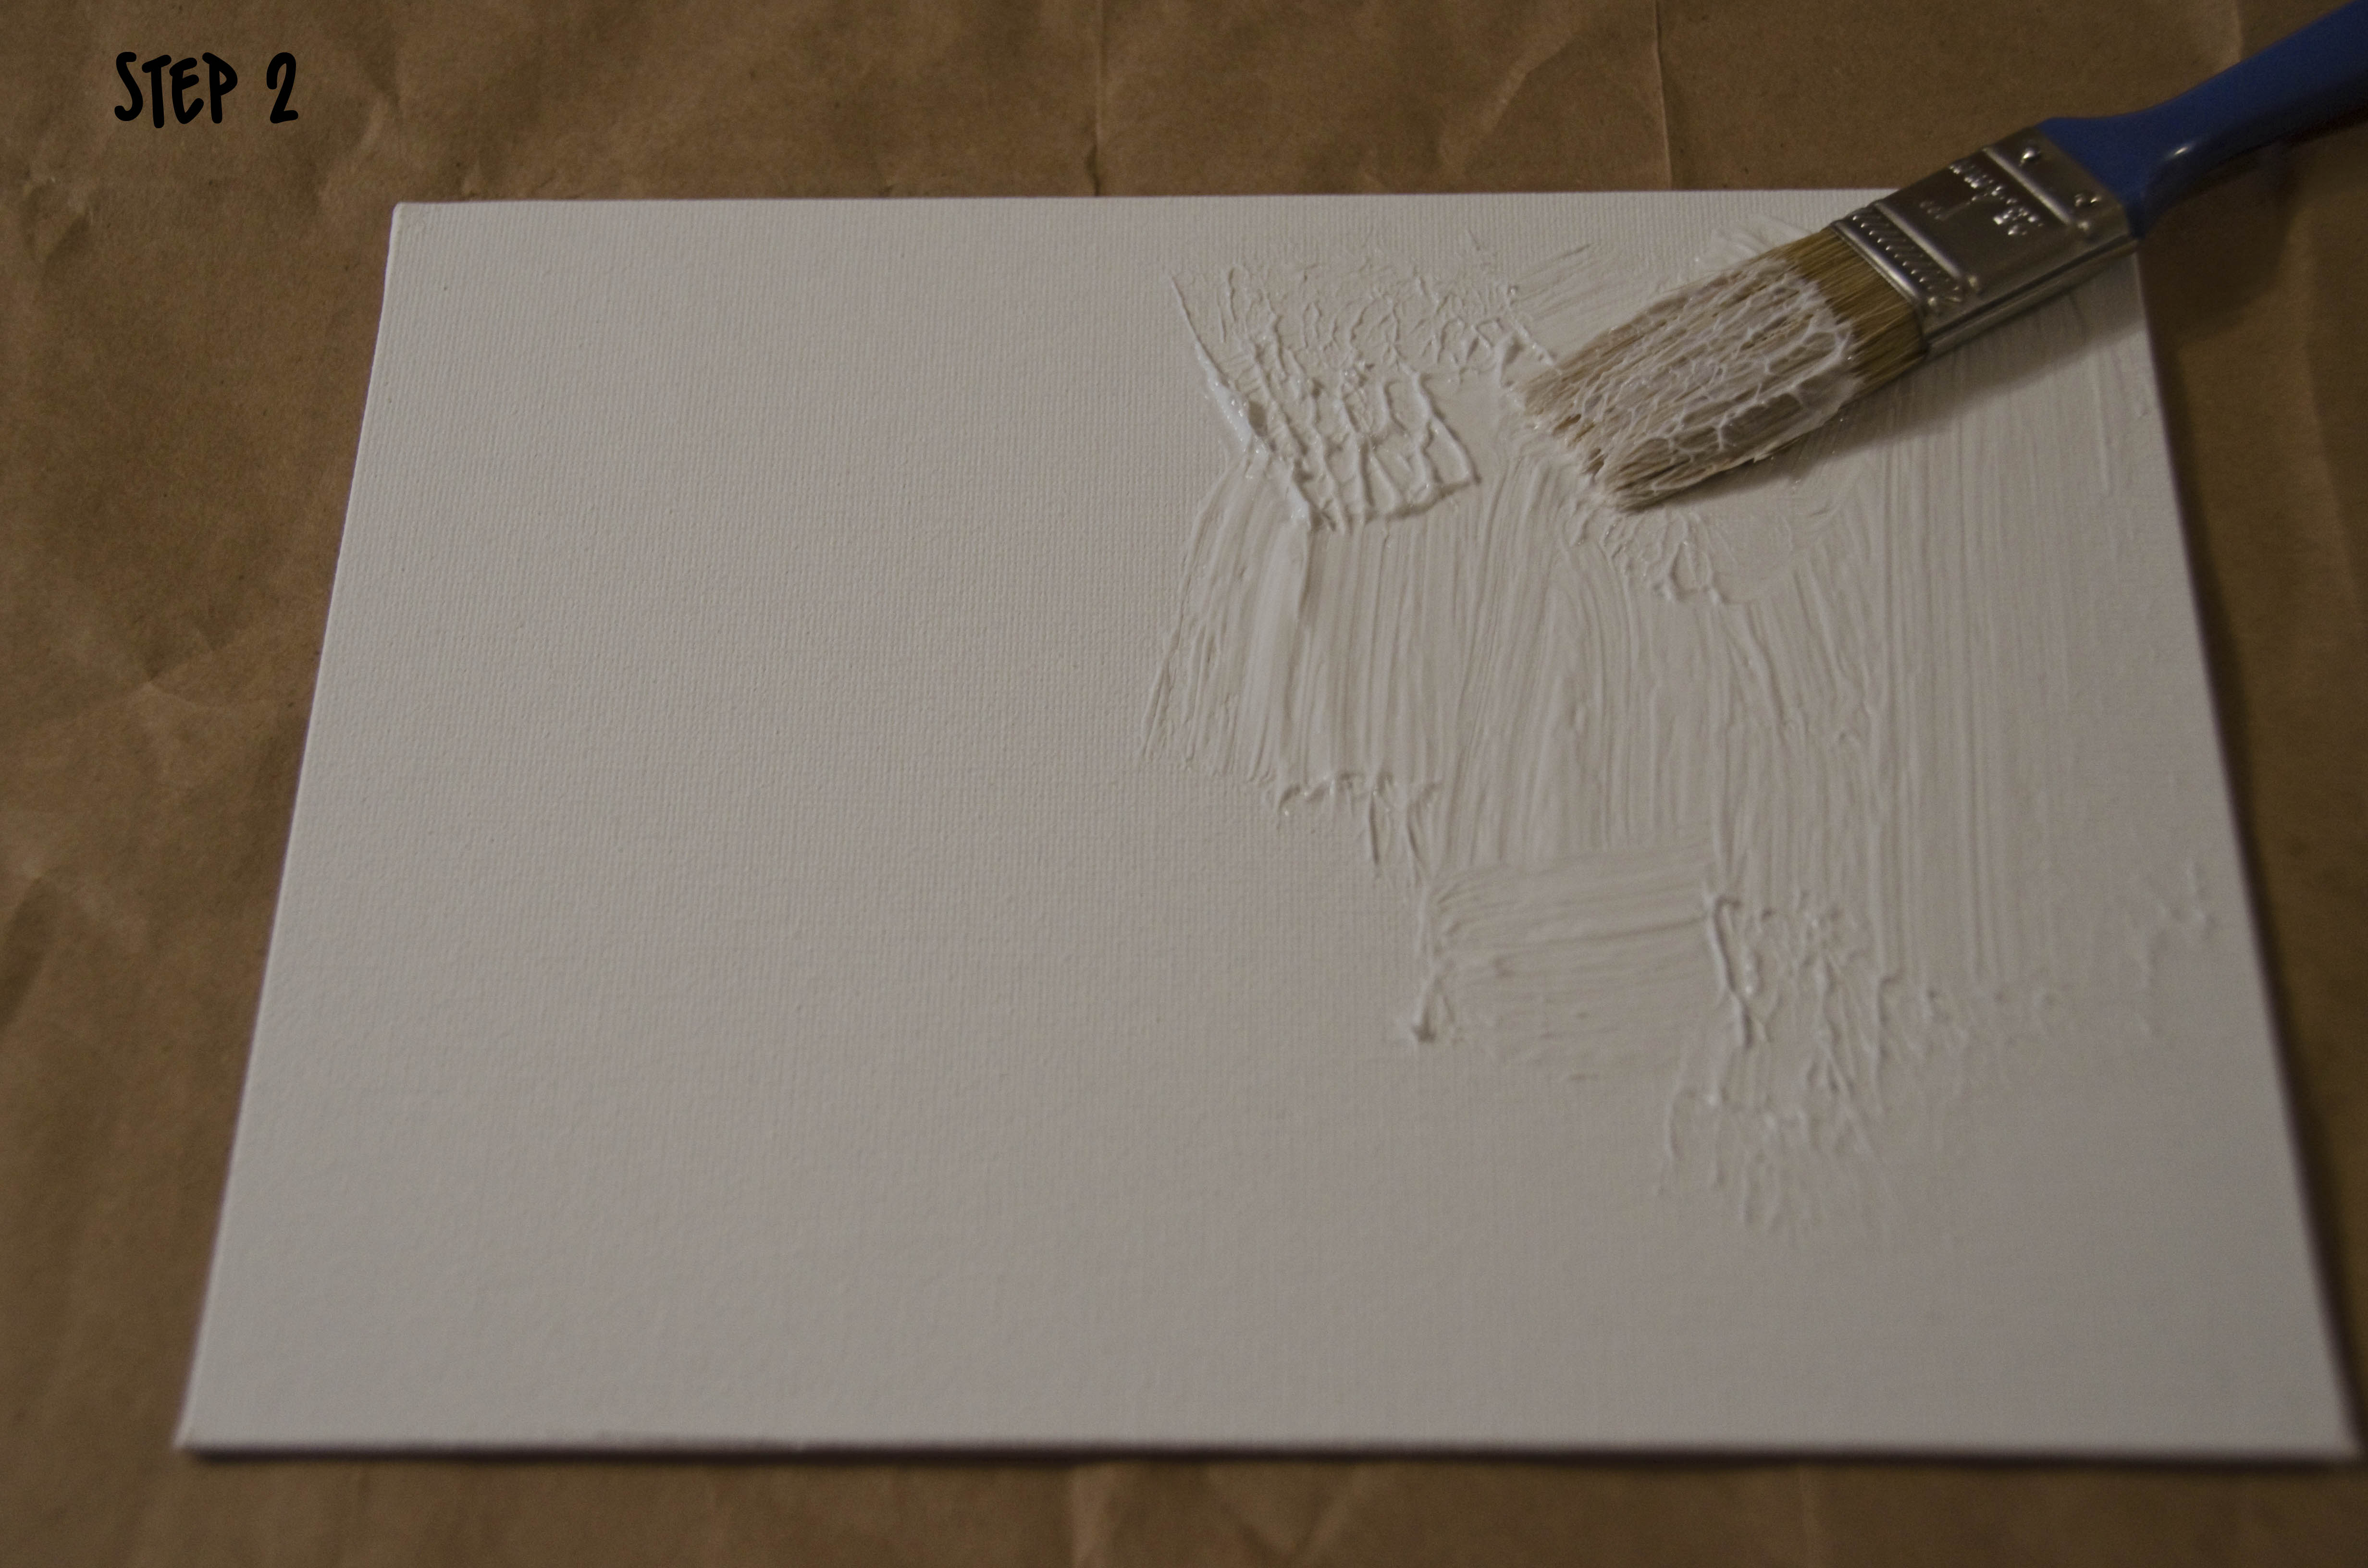
Step 2: Completely cover your canvas with a heavy coat of gel medium.
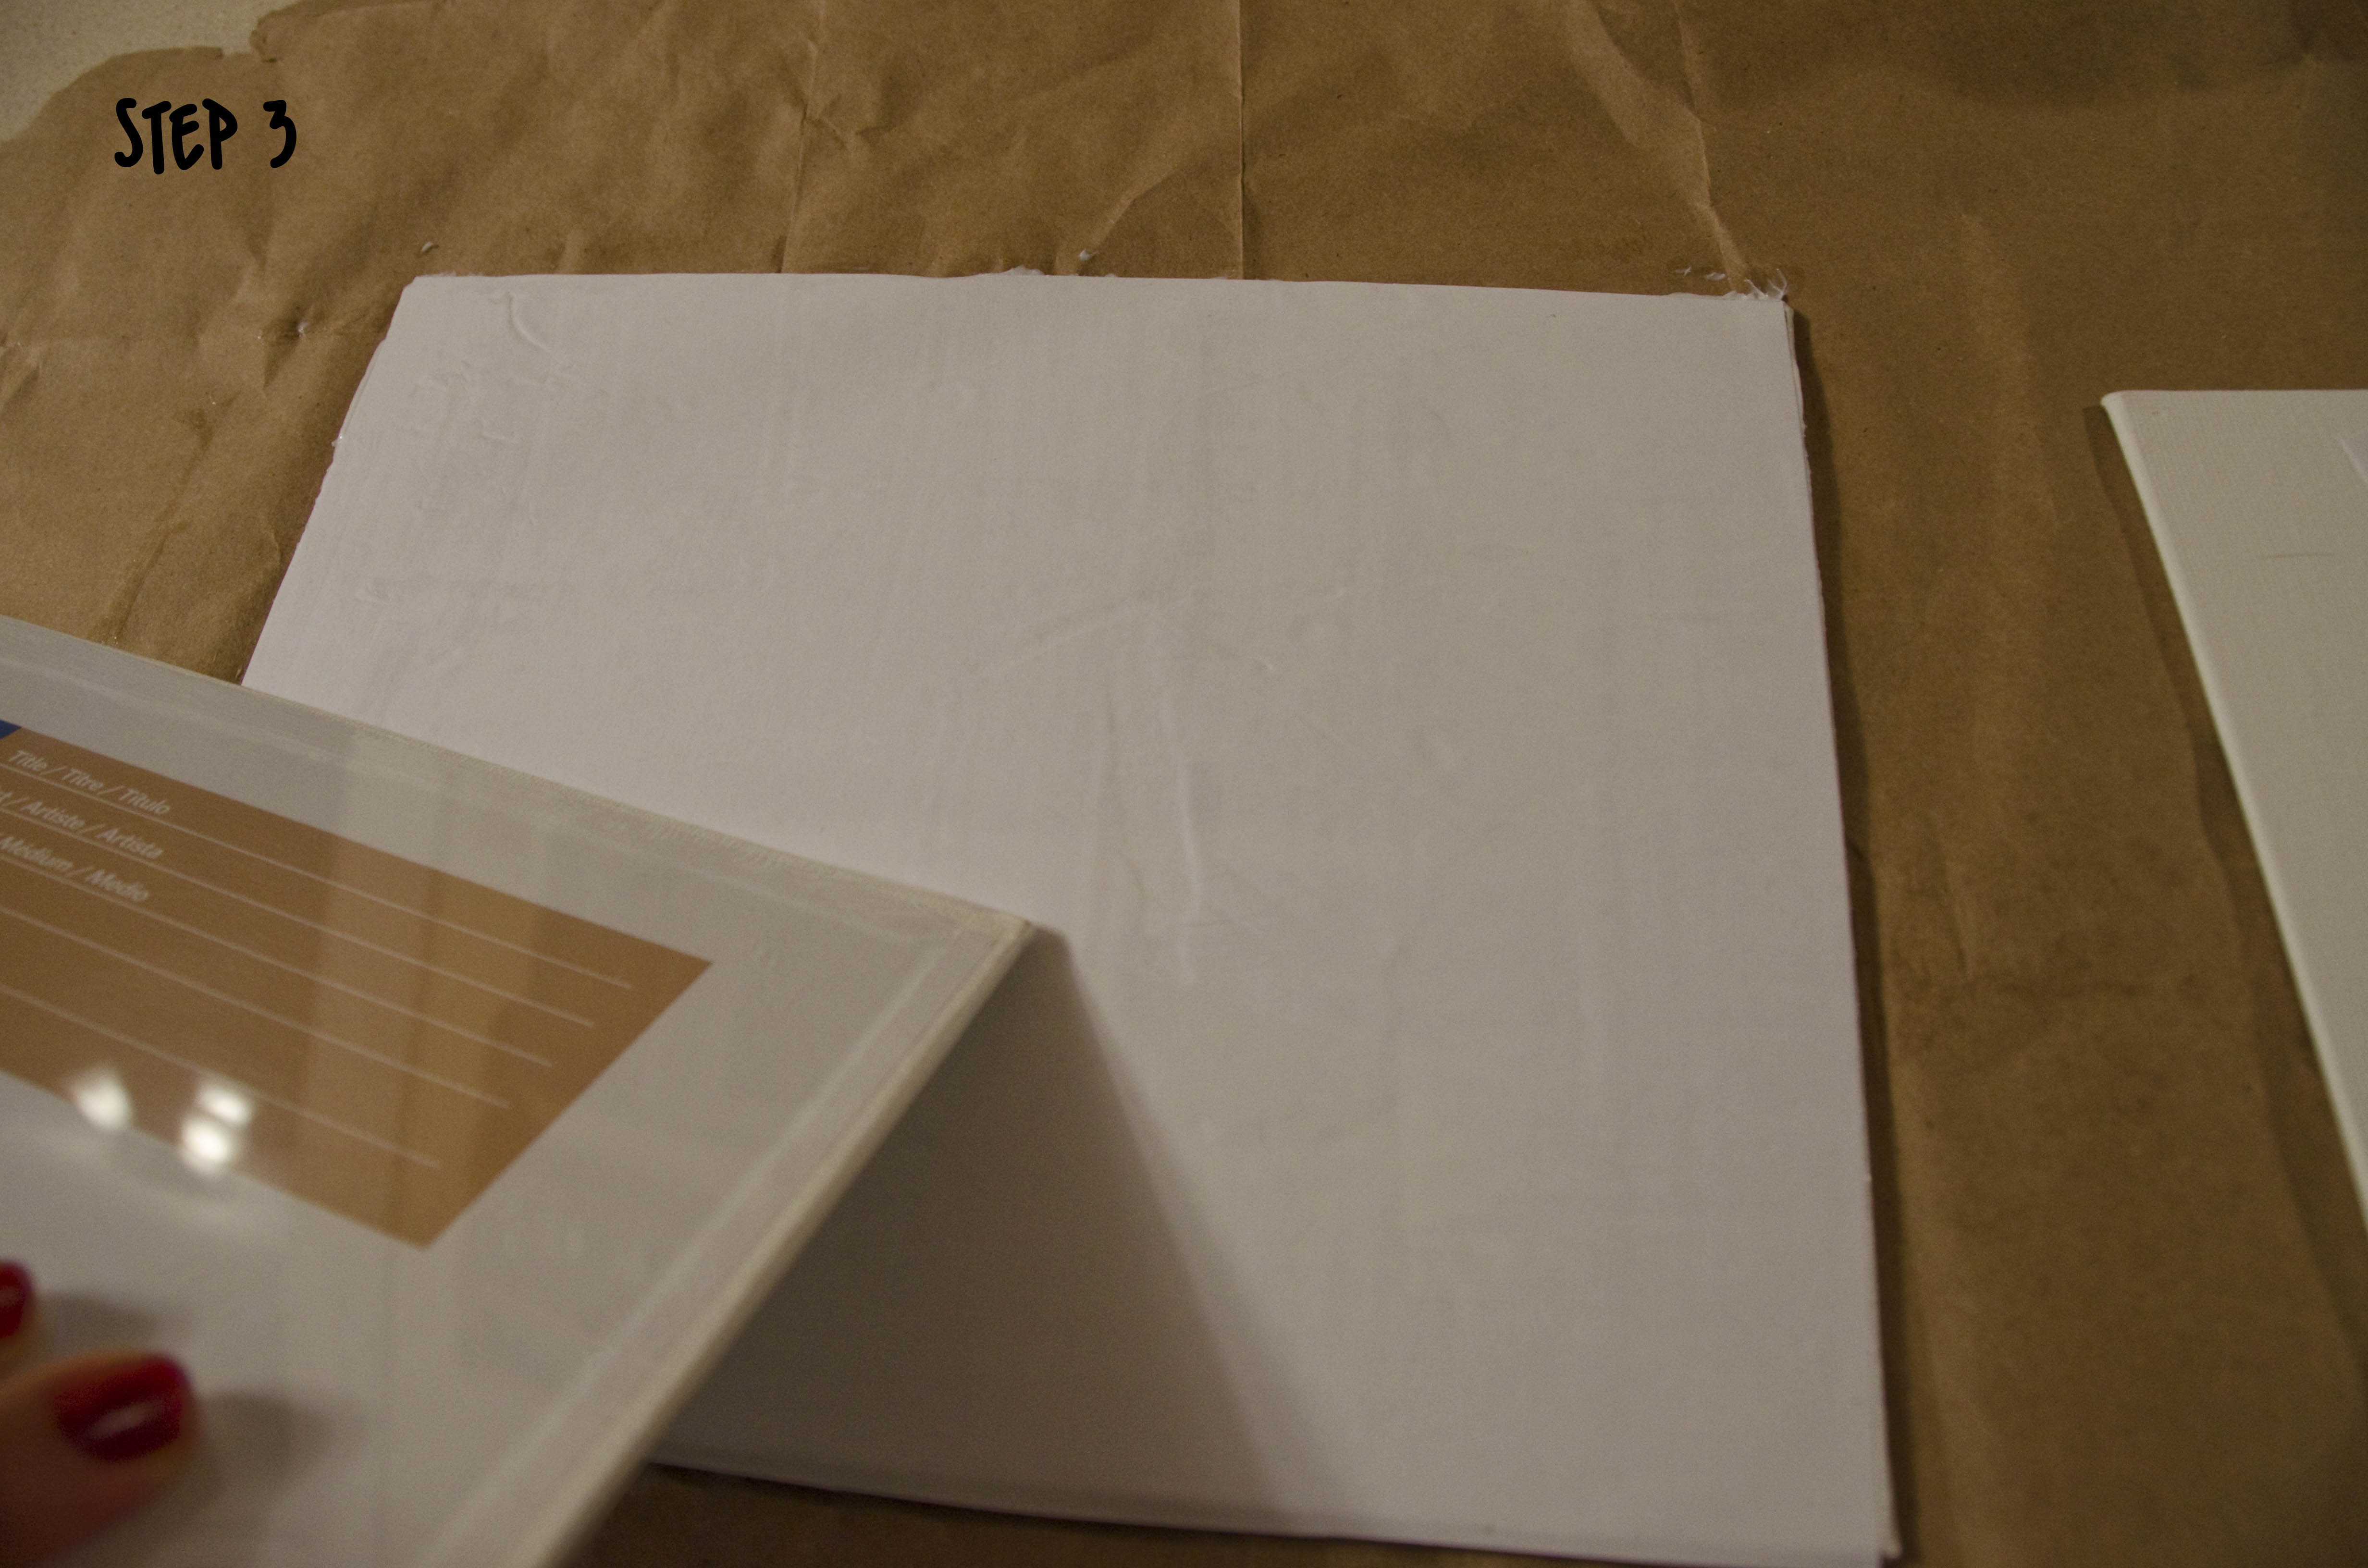
Step 3: Press the photo copy onto the canvas and let it dry completely.Make sure that you press it on really well and get all the air bubbles out. I went over it with another canvas board. Just leave the plastic wrap on the second board and rinse it off in the sink when you’re done. I let the color photo dry for about 3 hours, and left the black and white picture overnight as a test. I recommend overnight, or at least 6 hours. It came out much better and the paper was easier to peel without any of the transfer rubbing off.
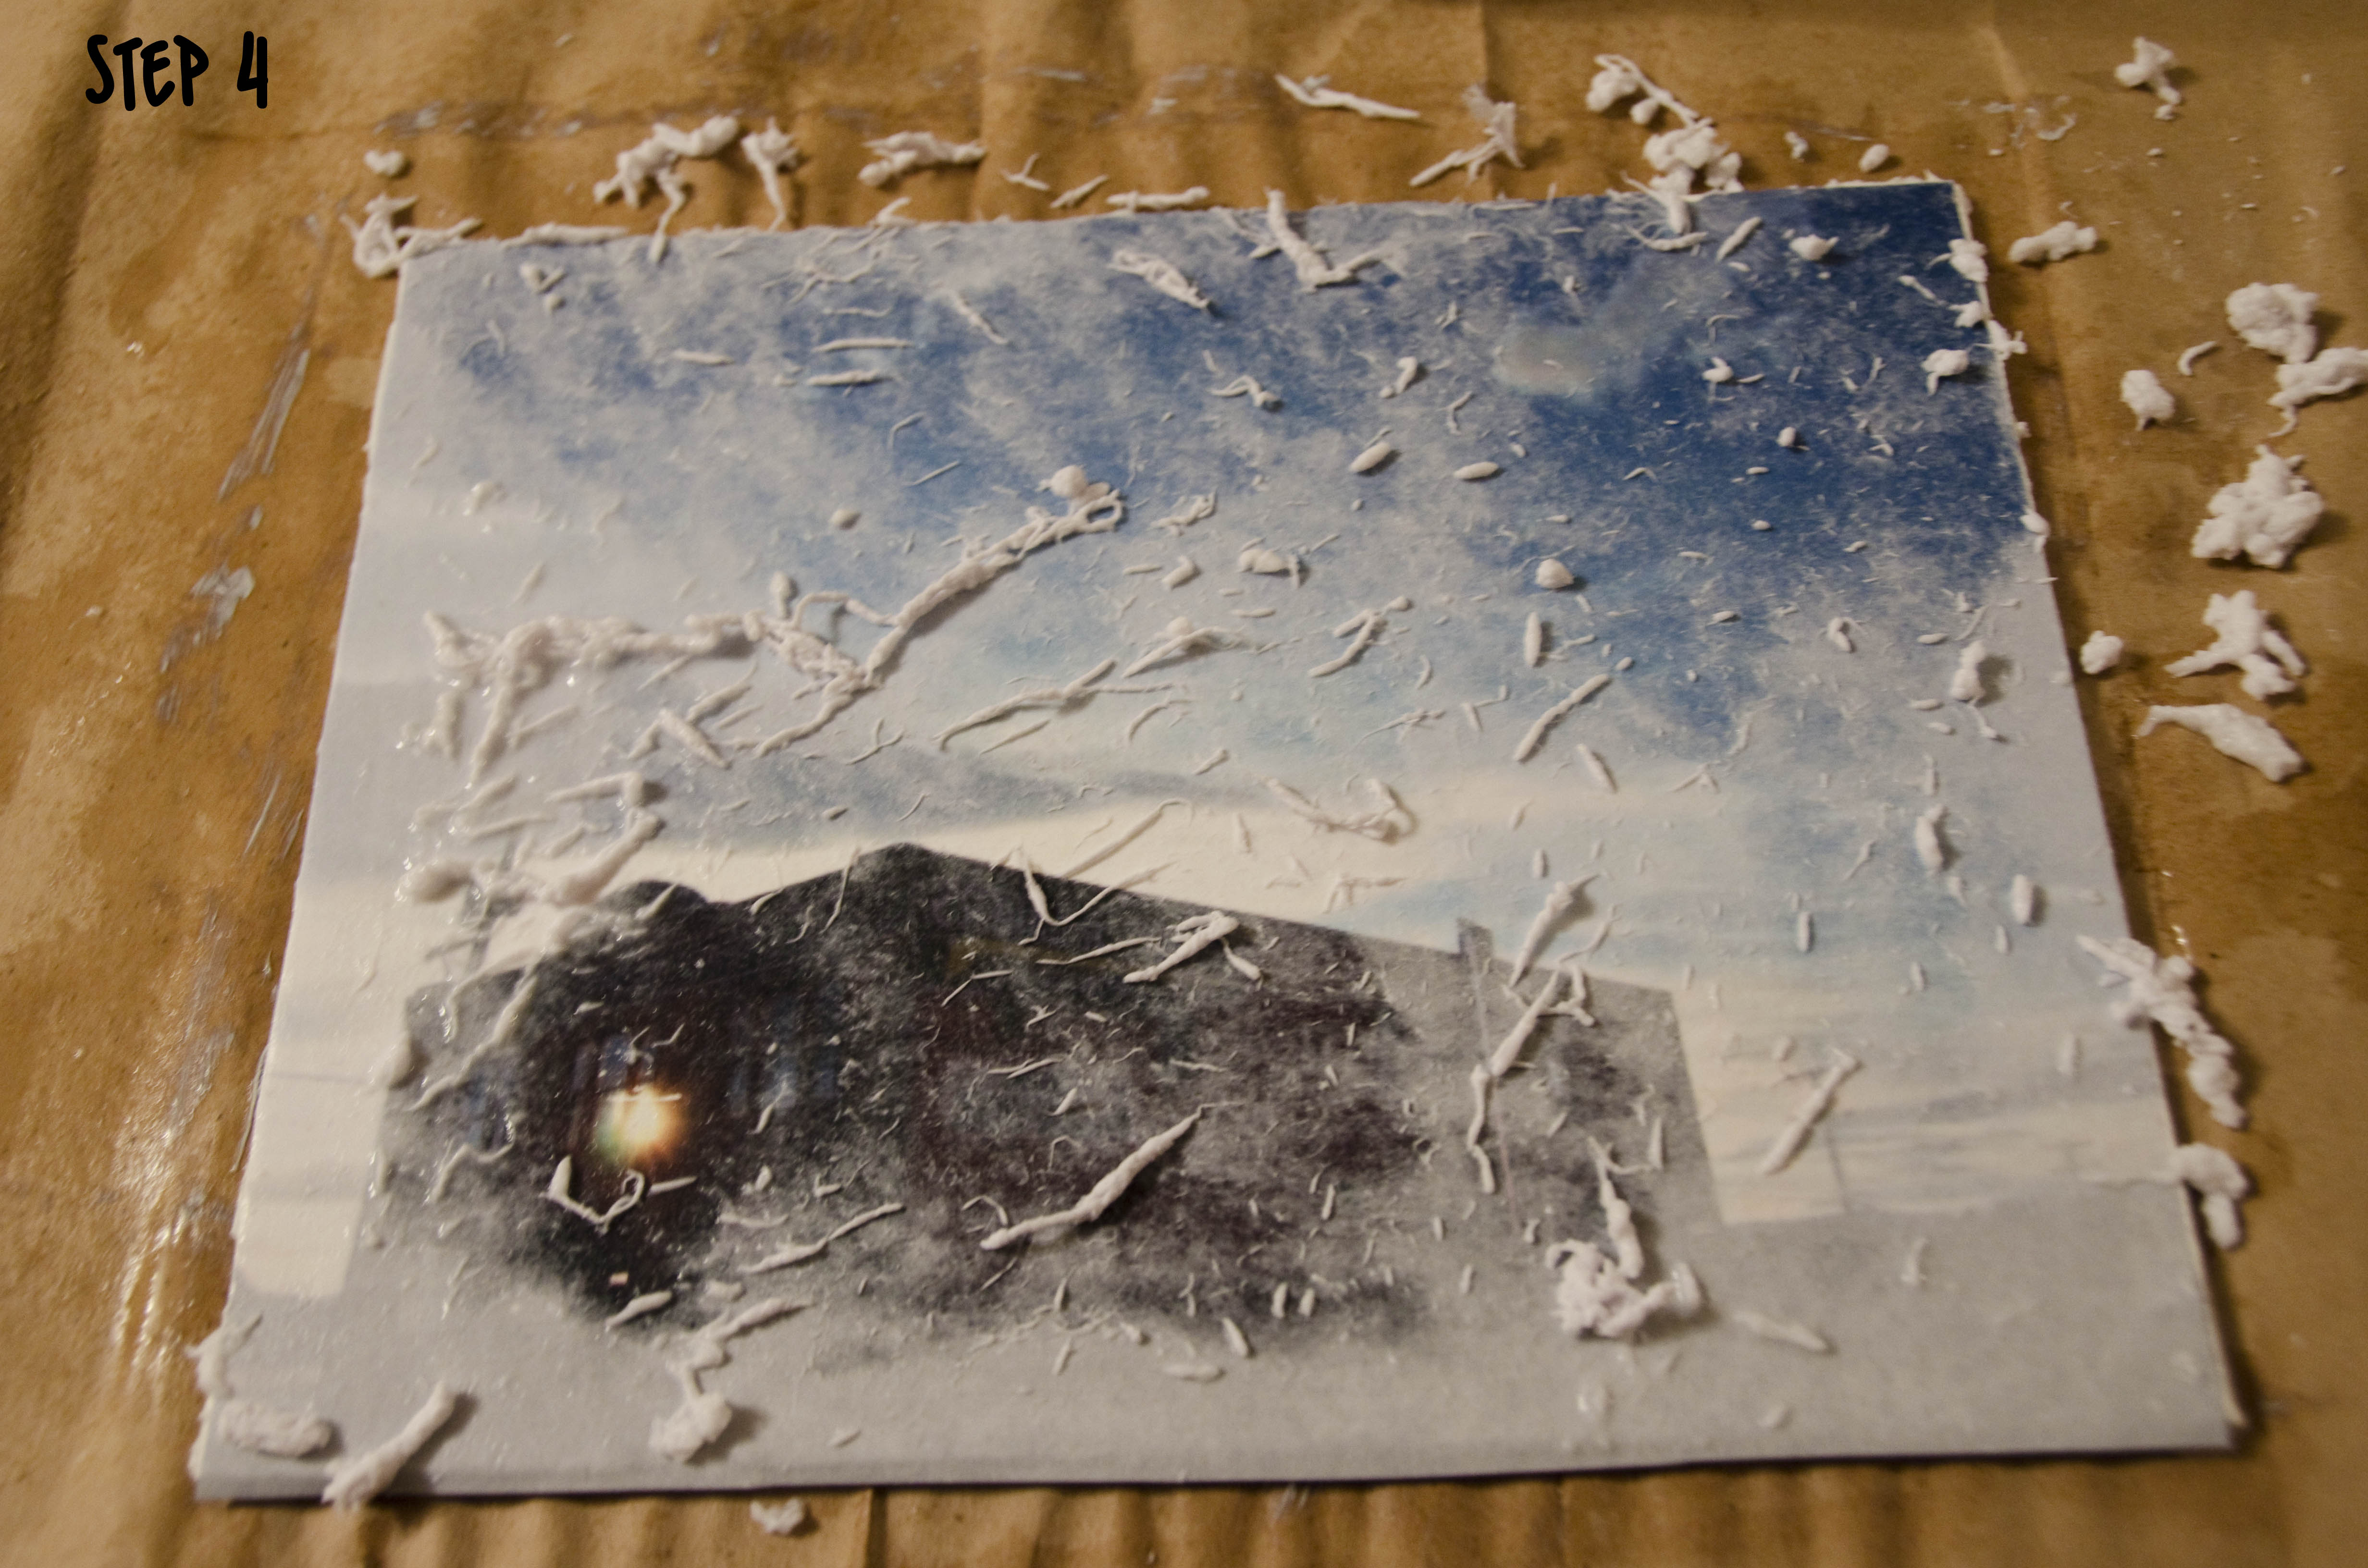
Step 4: After your image is completely dry, spray the top with water. Don’t be afraid to douse it. It really needs to get wet in order for the paper to become loose enough to start peeling off. Once it starts peeling, you can calm down with the water, though. You don’t want to totally soak the board and end up warping it. Rub the surface so that pieces of the paper start to come off and your image is be revealed! Doesn’t it look cool to see the image coming through? This step takes a lot of patience. It took me about 15-20 minutes to gently rub the paper off. If you get overzealous, the transfer will rub off in little chunks and once its gone, there’s no putting it back on. You can see that this happened quite a bit on the color image. I was much more careful the second time around.
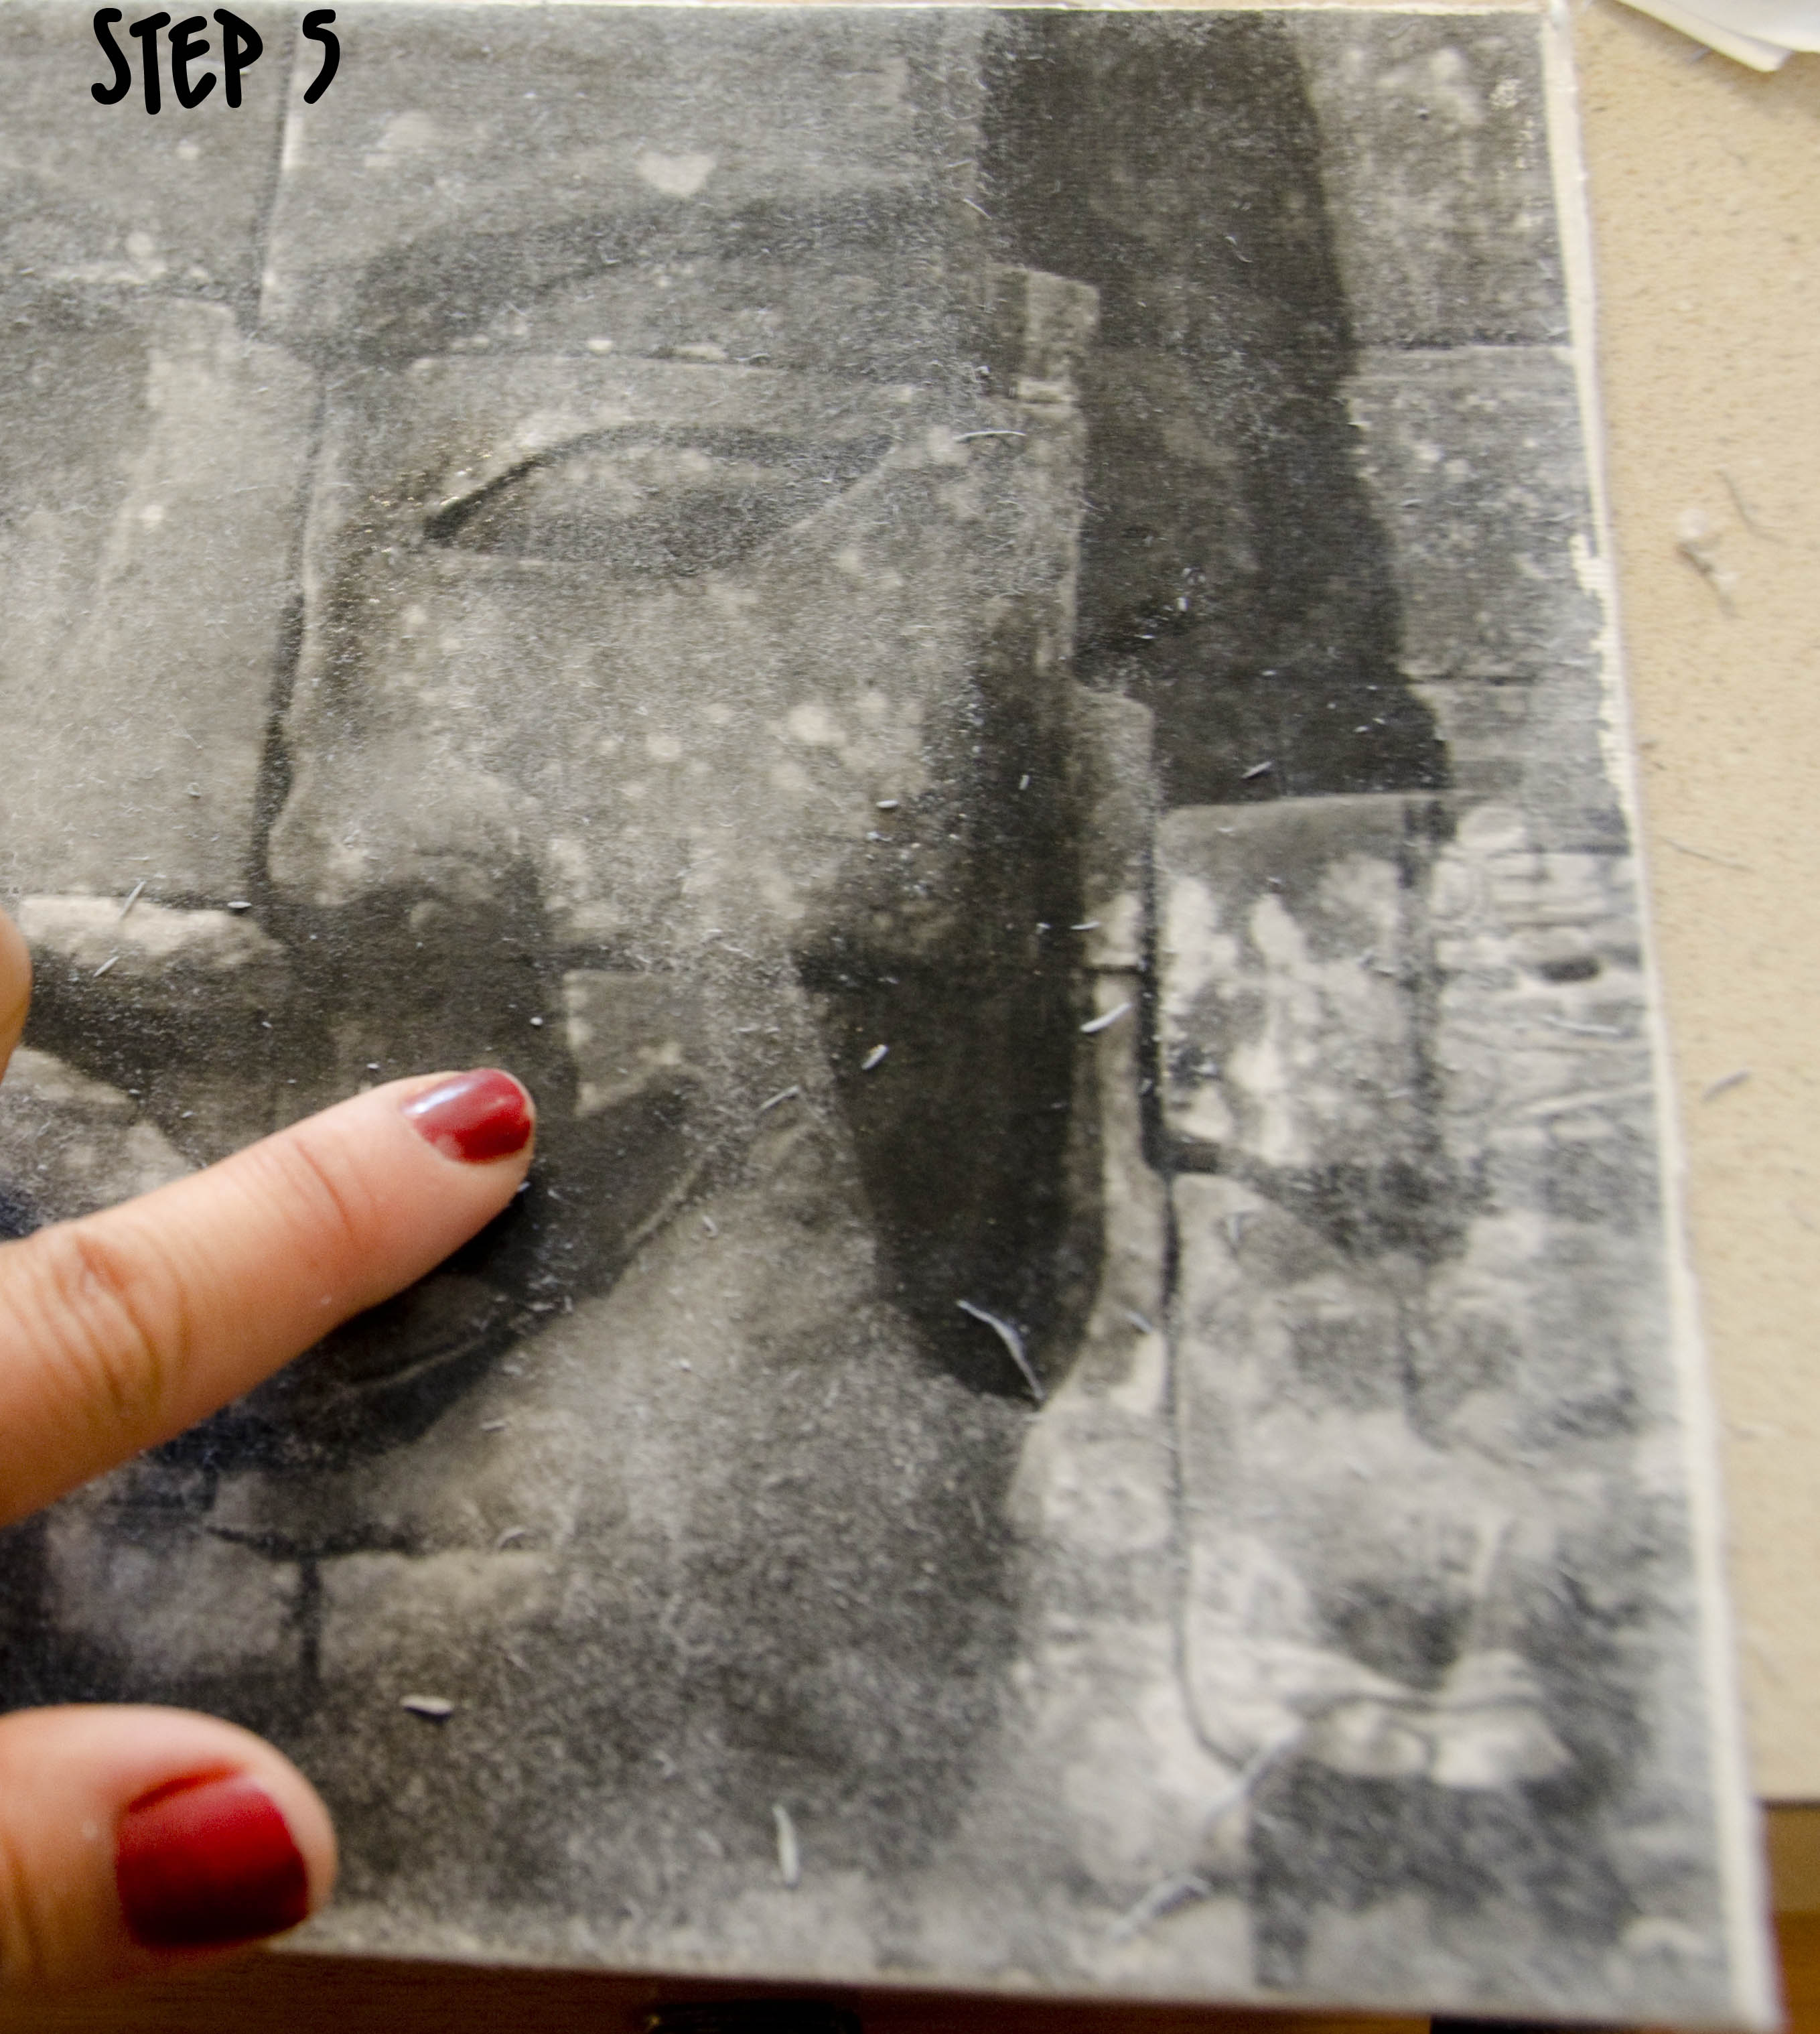
Step 5: Also, once you’ve gotten as much of the paper off as you can, you’ll notice that there is still a light film over the canvas that you can’t seem to remove, no matter how much you spray it. The trick here is to let it dry, then wet just your fingers and rub the dry board. The last bit will come off. Be very gentle! I didn’t do this with the color print and as you can see, it’s much hazier. However, this is kind of a cool “instagram-ey” effect if that’s what you want to go for. PS- you might as well take off any nail polish that you happen to be wearing beforebeginning this project- as you can see, it won’t be staying on for long….
Step 6: Cover canvas with one more light coat of gel to seal the image.
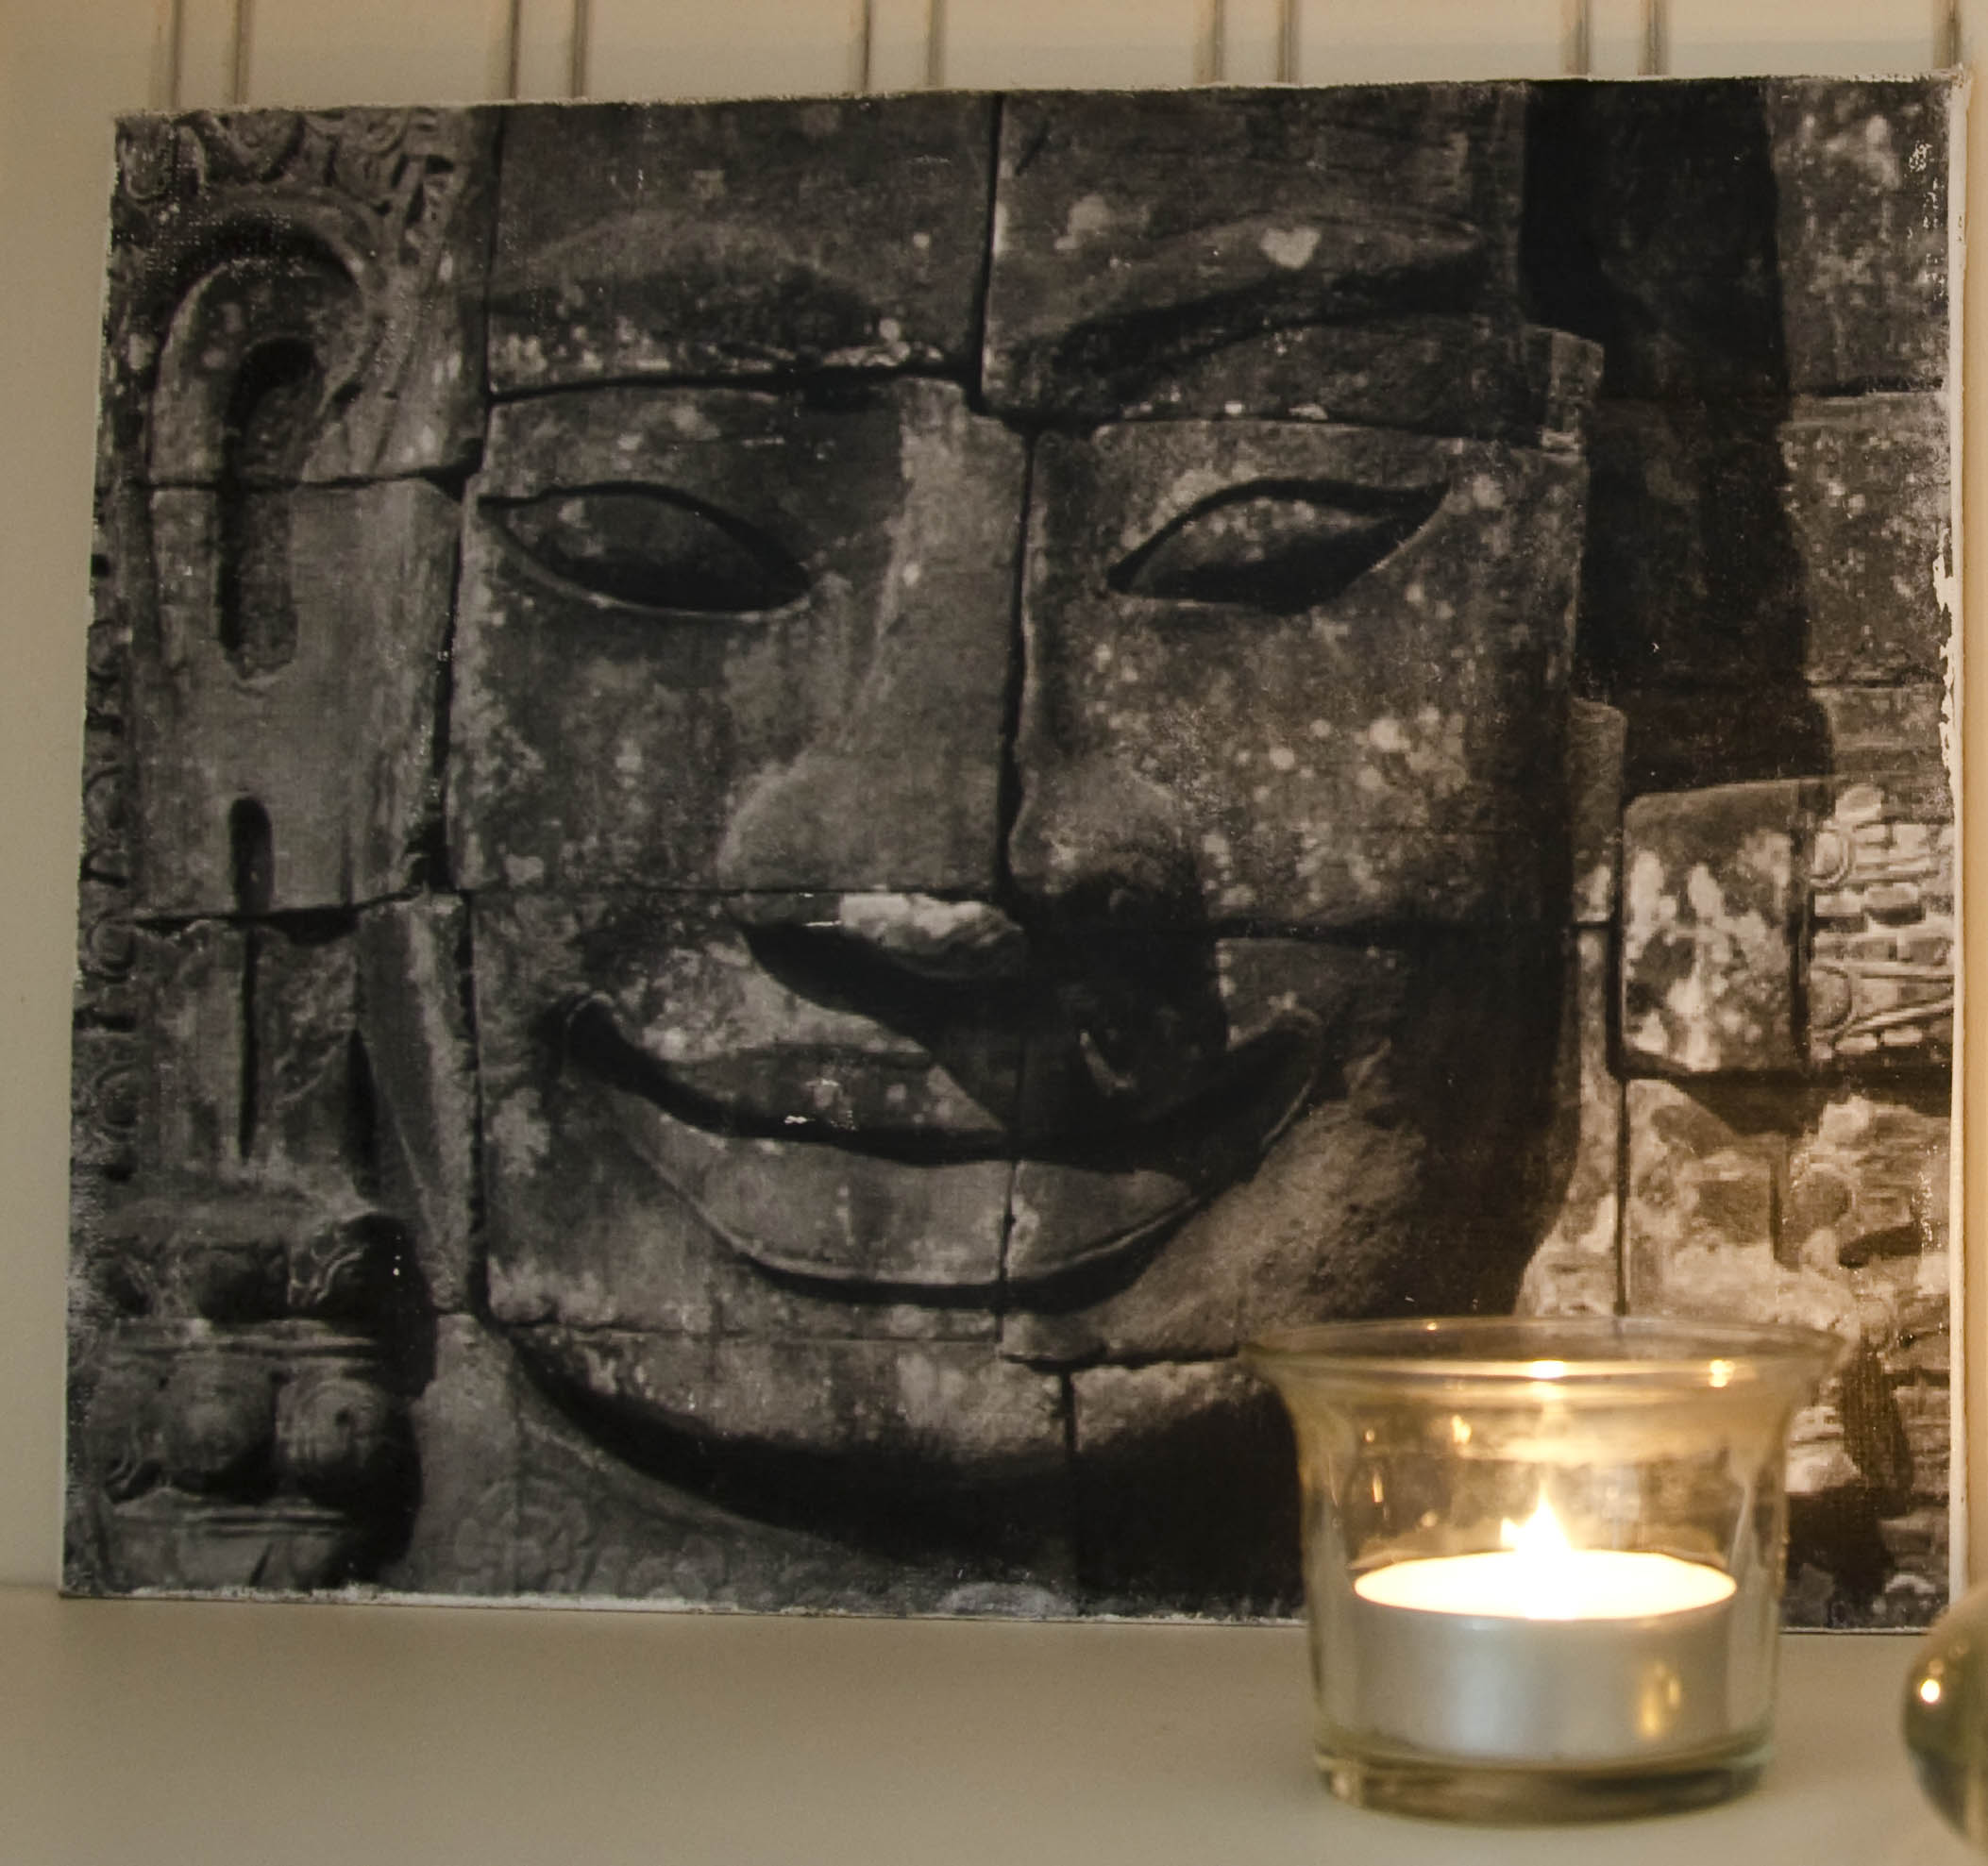 I’m really happy with the way these came out! I definitely plan on experimenting with this a lot more. Have fun!
~*~ Serenity
This is something I think Clicks should try... what do you think??


